 Save
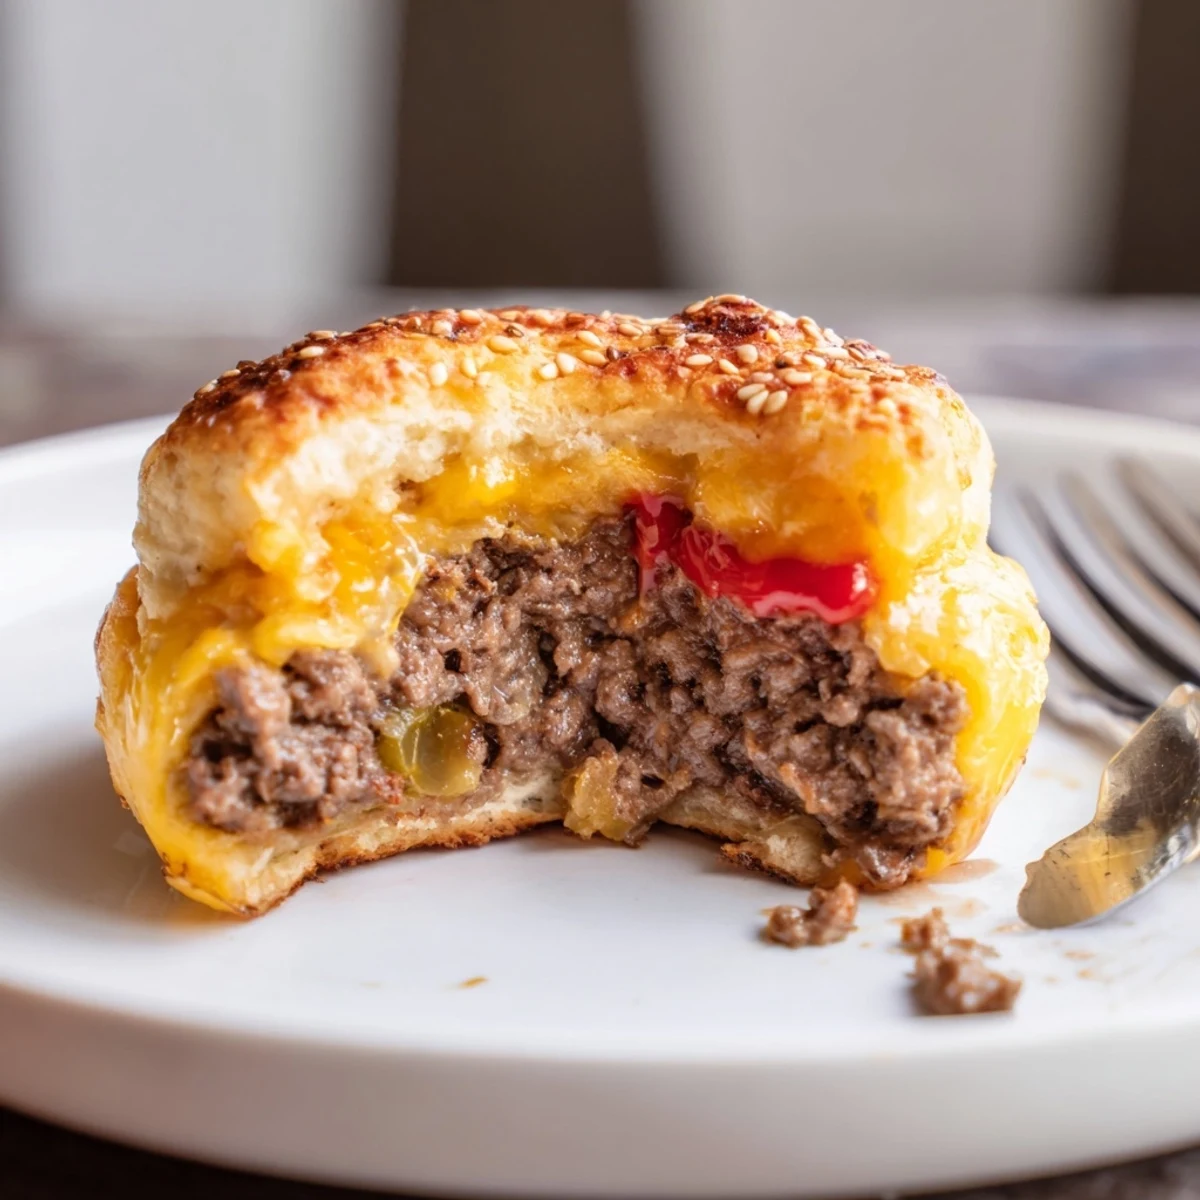
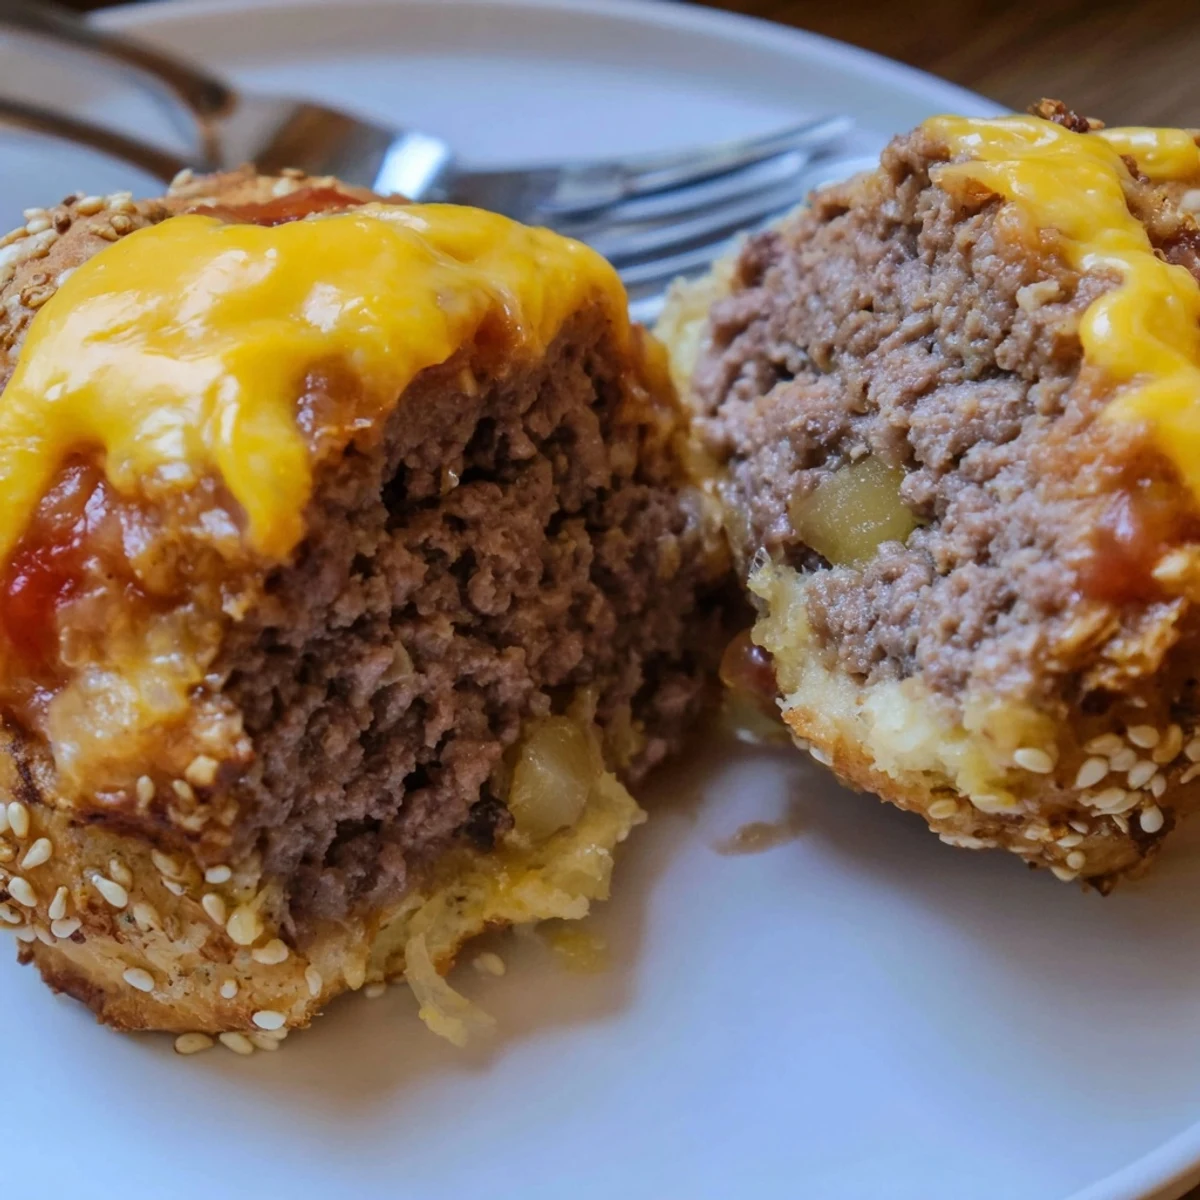
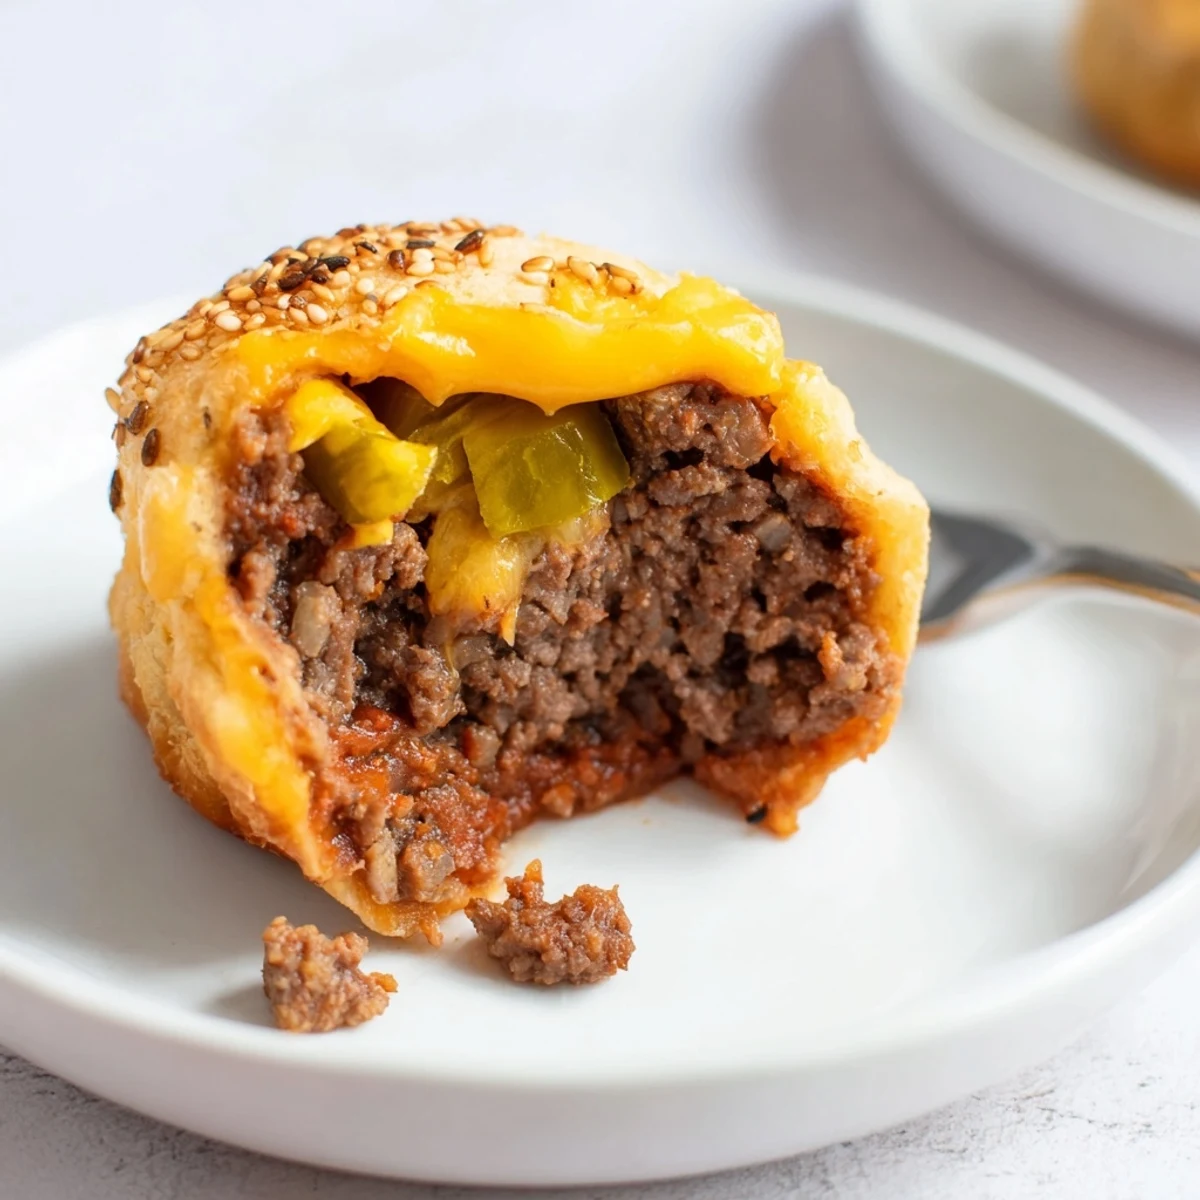
Save These cheesy cheeseburger bombs are biscuit-wrapped beef patties stuffed with shredded cheddar and a mozzarella cube. Sauté onion with garlic powder, brown the beef, then stir in ketchup, mustard and Worcestershire. Cool slightly, fill flattened biscuit rounds, seal well, brush with egg wash and sesame seeds, and bake at 200°C (400°F) until golden. Rest briefly and serve with favorite burger sauces.
You know that unmistakable sizzle when diced onions hit a hot skillet—it's a sound my kitchen loves. The first time I made these cheesy cheeseburger bombs, I was in the mood for comfort food with an unpretentious twist. There was no grand plan, just the irresistible idea of wrapping all my favorite burger flavors into a handful of golden parcels. When the warm scent of baking biscuits met savory beef, even the dog sat up straighter.
One Saturday lunch, my friends showed up asking for cheeseburgers but I hadn’t gone shopping in days. I cobbled together these bombs with a can of biscuit dough and whatever cheese was left in the fridge; everyone ended up eating them with their hands around the kitchen island, dipping them in whatever condiments we found. It was chaos, but the laughter and melted cheese made it perfect.
Ingredients
- Ground beef: Browning it patiently with onions makes the filling juicy and flavorful—don’t rush this part.
- Shredded cheddar cheese: Sharp cheddar gives the bombs a classic cheeseburger punch, and finely shredding helps it melt into every bite.
- Mozzarella cubes: The melty center is pure magic; chill your mozzarella first to keep it inside the dough as it bakes.
- Onion: Finely diced for even cooking, it brings out a subtle sweetness in the filling.
- Pickle: Optional but highly recommended; even skeptics end up loving the tangy little bits.
- Refrigerated biscuit dough: Store-bought dough saves prep time—I gently flatten them with my fingers for the perfect bomb shape.
- Ketchup & mustard: Stirring these into the beef gives the flavor everyone expects from a top-tier burger.
- Worcestershire sauce: Don’t skip this—it deepens the umami in the filling.
- Garlic powder, salt, black pepper: The essentials for building up those little layers of savory goodness.
- Egg: An egg wash makes each bomb glossy and helps sesame seeds stick.
- Sesame seeds: For that classic burger bun finish, plus a tasty little crunch.
Instructions
- Get ready to bake:
- Preheat your oven to 200°C (400°F) and line a baking sheet with parchment paper so nothing sticks later.
- Sauté and brown:
- Let the onion sizzle in your skillet until it's soft and fragrant, then toss in the beef, garlic powder, salt, and pepper, breaking it apart as it browns—all those caramelized bits are flavor gold.
- Bring bold flavors together:
- Stir in ketchup, mustard, Worcestershire, and optional pickle until coated, then take it off the heat to cool for a few minutes—rushing this step can melt your cheese too soon.
- Assemble the bombs:
- Flatten each biscuit round in your palm, then mound on a spoonful of the beef mixture, a little cheddar, and finally, press a mozzarella cube right in the center.
- Seal in the magic:
- Pull the dough edges over the fillings and pinch tightly—if a little cheese tries to escape, press it back in and turn the seam down on the sheet.
- Make them shine:
- Brush each bomb with a quick sweep of beaten egg, then sprinkle sesame seeds over the top so they look just like mini burger buns.
- Bake to golden perfection:
- Slide your tray into the oven and watch as the tops puff and turn deeply golden in about 15-18 minutes—the kitchen will start to smell incredible.
- Let them rest a second:
- Give the bombs five minutes to cool so the molten cheese doesn’t burn anyone’s fingers (or tongues!).
 Save
Save The first time I brought these out for my nephews, they started guessing what could possibly be hiding inside each golden ball. The simple anticipation of that cheesy middle turned regular dinner into an event; now, any family gathering feels empty without them.
Getting Creative with Fillings
I’ve tried swapping out cheddar for pepper jack or tossing in a spoonful of crispy bacon bits right alongside the beef—hardly anyone complains about the various combinations. Playing around here keeps the recipe fun and lets everyone in the kitchen put their own spin on them. Even a handful of sautéed mushrooms sneaks in extra goodness for mushroom fans.
Entertaining with Cheeseburger Bombs
Serving these at game night or parties is a revelation: no plates or silverware, just napkins and plenty of dipping sauces within reach. Suddenly, everyone migrates to the kitchen, hoping to snag a bomb while they're still hot. They vanish fast, but sneak one aside for yourself before they do!
Lessons Learned from (Many) Kitchen Mishaps
I’ve definitely left these in the oven a few minutes too long once or twice – don't let the golden tops fool you, they darken quickly. I now peek in at the 15-minute mark, just in case. As much fun as it is to go wild with fillings, don’t overstuff, or you’ll end up with a cheese eruption instead of a melty middle.
- Let the filling cool before assembling to prevent dough from getting sticky.
- Arrange bombs with space between so they bake evenly and don't merge.
- Serve with your favorite burger sauce for extra flavor—it's the best part.
 Save
Save These cheeseburger bombs have a way of turning any table into a gathering place. I hope you have as much fun making and sharing them as we always do over here.
Common Questions
- → Can I swap the cheddar for another cheese?
-
Yes. Pepper jack adds heat, Monterey Jack or Gouda give a milder, creamier finish. Use cheeses that melt well so the interior becomes gooey after baking.
- → How do I prevent leaking during baking?
-
Pinch the biscuit seams tightly and press the edges with a fork or your fingers. Chill the filled balls briefly before baking to help the dough hold shape and reduce leaks.
- → Can these be made ahead or frozen?
-
Make ahead by assembling and freezing on a tray until firm, then transfer to a bag. Bake from frozen, adding a few extra minutes to the baking time and watching for a golden crust.
- → What’s the best way to reheat leftovers?
-
Reheat in a 180°C (350°F) oven for 8–10 minutes to restore crispness. Avoid microwaving if you want to keep the biscuit exterior flaky and golden.
- → How can I make these gluten-free?
-
Use a gluten-free biscuit or pastry dough that performs similarly in the oven. Check labels for binders and adjust handling as some gluten-free doughs are more fragile.
- → Any tips for a crispier exterior?
-
Brush with egg wash and use a hot baking sheet or preheated baking stone. Bake until deep golden and allow a short rest so the interior sets without soggy dough.