 Save
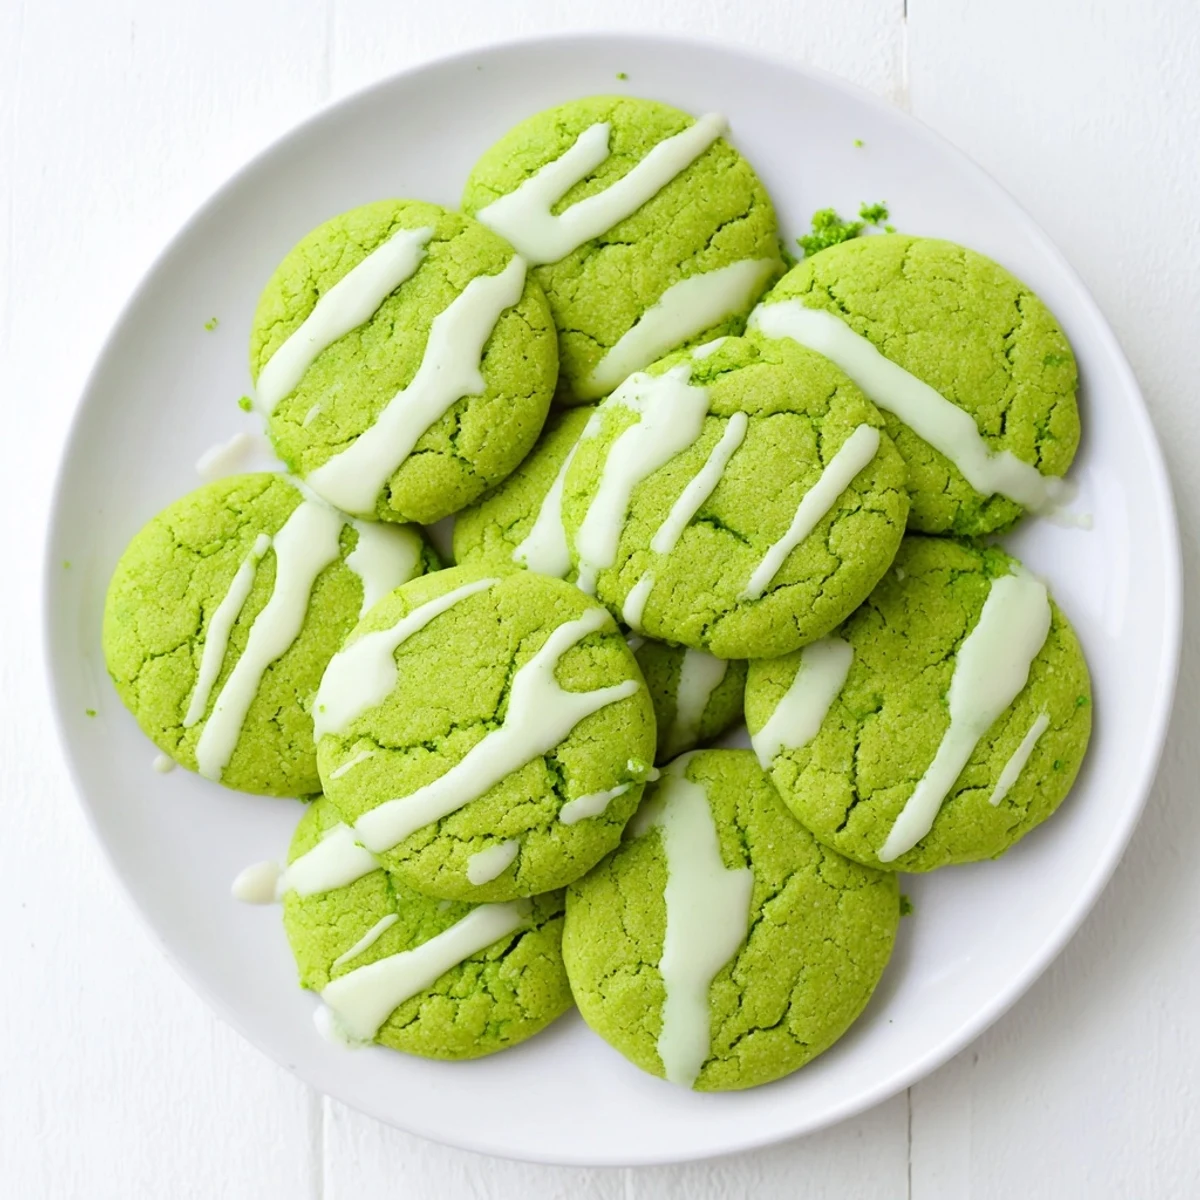
Save These soft green velvet cookies feature a tender, cake-like crumb and striking color that makes them perfect for holiday celebrations or special occasions. The dough comes together quickly with creamed butter, sugars, and cocoa powder, while green food coloring creates the signature vibrant hue. After baking until edges are set but centers remain soft, the cookies are drizzled with melted white chocolate for a sweet finishing touch. Each batch yields 24 cookies that stay fresh for up to five days when stored in an airtight container.
The first time I made these, my kitchen smelled like chocolate while these impossible green discs emerged from the oven, like something from a storybook. I'd been hesitant about adding food coloring to dough, but seeing my niece's eyes light up when she saw them made every drop of green worth it. Now they're the cookie everyone actually reaches for first.
Last December, I brought a platter to my office cookie exchange and watched three different people ask if I'd bought them from a bakery. The contrast of that vivid green against pure white chocolate stopped everyone in their tracks. Someone actually took a photo before taking a bite.
Ingredients
- All-purpose flour: The foundation that gives these cookies their tender structure without making them tough
- Unsweetened cocoa powder: Essential for the red velvet style flavor and that gorgeous dark green when it meets the food coloring
- Baking powder and baking soda: The duo that creates those perfect slightly puffy centers
- Salt: Just enough to make the sweetness pop without tasting salty
- Unsalted butter: Room temperature is nonnegotiable for that creamed texture that makes cookies melt in your mouth
- Granulated and brown sugar: Brown sugar adds moisture while white creates those crackly edges we love
- Large eggs: Bring them to room temperature too, or they'll seize up your butter mixture
- Whole milk: The fat content matters here for tenderness
- White vinegar: Reacts with cocoa and baking soda for that signature velvet softness
- Gel green food coloring: Liquid coloring can throw off your dough consistency, gel is worth the extra trip to the store
- White chocolate: Use the good stuff, cheap white chocolate wont melt smoothly for drizzling
Instructions
- Get your oven ready:
- Preheat to 350°F and line your baking sheets with parchment paper, this prevents sticking and makes cleanup effortless
- Whisk the dry team:
- Combine flour, cocoa powder, baking powder, baking soda, and salt in a medium bowl, then set it aside
- Cream the butter and sugars:
- Beat softened butter with both sugars for 2 to 3 minutes until it's pale and fluffy, this creates air pockets for softness
- Add the eggs:
- Drop them in one at a time, letting each fully incorporate before adding the next
- Pour in the wet ingredients:
- Mix in milk, vanilla, vinegar, and that shocking amount of green food coloring until everything is beautifully uniform
- Combine everything:
- Gradually fold in your dry ingredients just until no flour streaks remain, overmixing makes tough cookies
- Scoop and space:
- Drop dough by tablespoons onto your prepared sheets, leaving 2 inches between each for spreading
- Bake until barely set:
- 10 to 12 minutes should do it, you want edges firm but centers still soft and slightly underbaked
- The patience part:
- Let them cool on the baking sheets for 5 minutes before moving them to a wire rack, they'll crumble otherwise
- Melt the white chocolate:
- Zap it in the microwave in 20 second bursts, stirring between each, or use coconut oil for a silkier drizzle
- The grand finale:
- Flick that white chocolate back and forth over each cooled cookie using a fork, or pipe it for more controlled lines
 Save
Save My sister now demands these for her December birthday instead of cake, claiming they're the only cookie that feels like a celebration and comfort food simultaneously.
Getting That Perfect Green
I've learned that green food coloring looks brighter in dough than you expect, so start with less and add drop by drop until you reach your desired shade. The cocoa powder naturally darkens everything, so what looks like radioactive green in the bowl becomes a lovely emerald once baked.
Make Ahead Magic
Scoop the dough balls onto a parchment lined baking sheet and freeze them solid, then transfer to a freezer bag for bake anytime cookies. Add one extra minute to the baking time when going straight from freezer to oven.
Serving Suggestions
These are showstoppers on a dessert platter, especially during Christmas or St Patrick's Day. The color alone makes people smile before they even take a bite.
- Stack them in clear treat bags tied with green ribbon for party favors
- Pair with hot cocoa for the ultimate winter comfort combo
- Crumble them over vanilla ice cream for a festive sundae topping
 Save
Save There's something joyful about eating cookies that look like they came from a fantasy kitchen.
Common Questions
- → What makes these cookies green?
-
The vibrant green color comes from food coloring added to the dough. Gel coloring is recommended as it provides a deeper hue with less liquid.
- → Can I use natural food coloring?
-
Natural food coloring options like spinach juice or matcha powder can be used, though they may produce a more muted green shade and potentially alter the flavor profile.
- → Why is there cocoa powder in green cookies?
-
A small amount of cocoa powder creates the classic velvet flavor profile while minimally affecting the green color. It adds depth without overpowering the vanilla notes.
- → How do I get the perfect white chocolate drizzle?
-
Melt white chocolate in 20-second microwave bursts, stirring between each interval. Adding a teaspoon of coconut oil helps achieve a smoother consistency for drizzling.
- → Can I make the dough ahead of time?
-
Yes, the dough can be refrigerated for up to 24 hours before baking. Let it sit at room temperature for 15-20 minutes to soften slightly before scooping and baking.
- → What's the best way to store these cookies?
-
Store cooled cookies in an airtight container at room temperature for up to 5 days. Place parchment paper between layers to prevent the white chocolate drizzle from sticking.