 Save
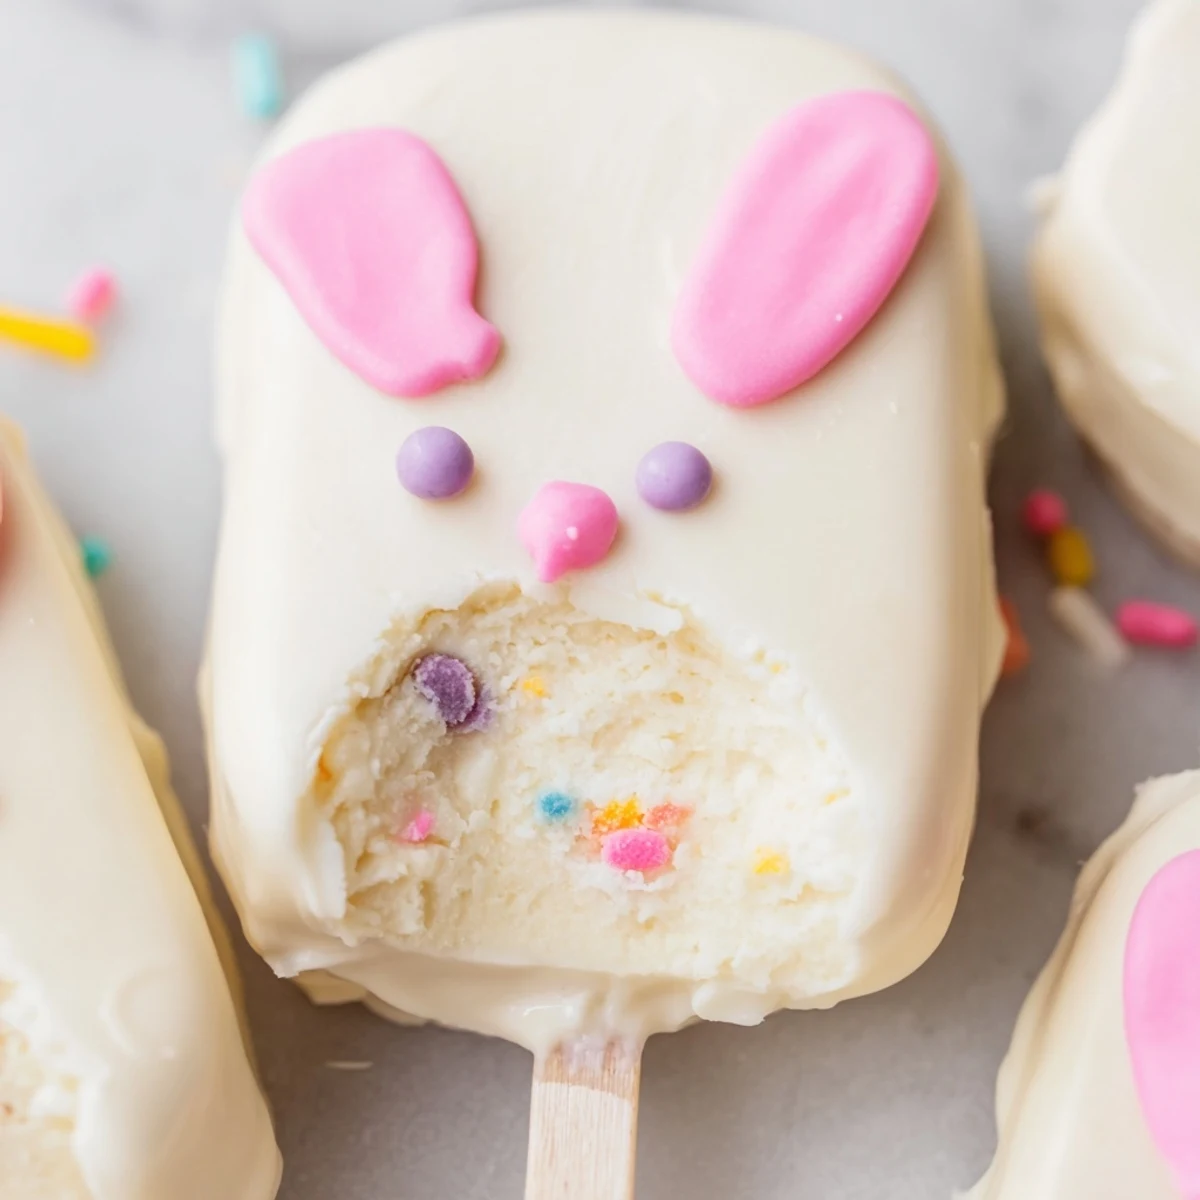
Save These charming white chocolate bunny cakesicles bring festive fun to your Easter celebration. The combination of moist vanilla cake blended with cream cheese creates the perfect dough consistency, while the smooth white chocolate coating provides a sweet finish. Each popsicle-shaped treat can be customized with colorful decorations, candy eyes, and fondant bunny features, making them both adorable and delicious.
Last Easter, my niece decided she was too old for regular egg hunts but still wanted something magical in her basket. I found these bunny cakesicles in a pinch, mixing crumbled cupcakes from a failed attempt the day before. Her eyes lit up when she pulled a chocolate-dipped bunny face from the grass, and I knew these treats were staying in our holiday rotation forever.
I learned the hard way that refrigerating the shaped cakesicles before dipping is non-negotiable. My first batch fell right off the sticks into the melted chocolate, creating a sad little puddle that still tasted delicious but looked nothing like bunnies. Now I never skip that chilling step, and every bunny stays intact and picture-perfect.
Ingredients
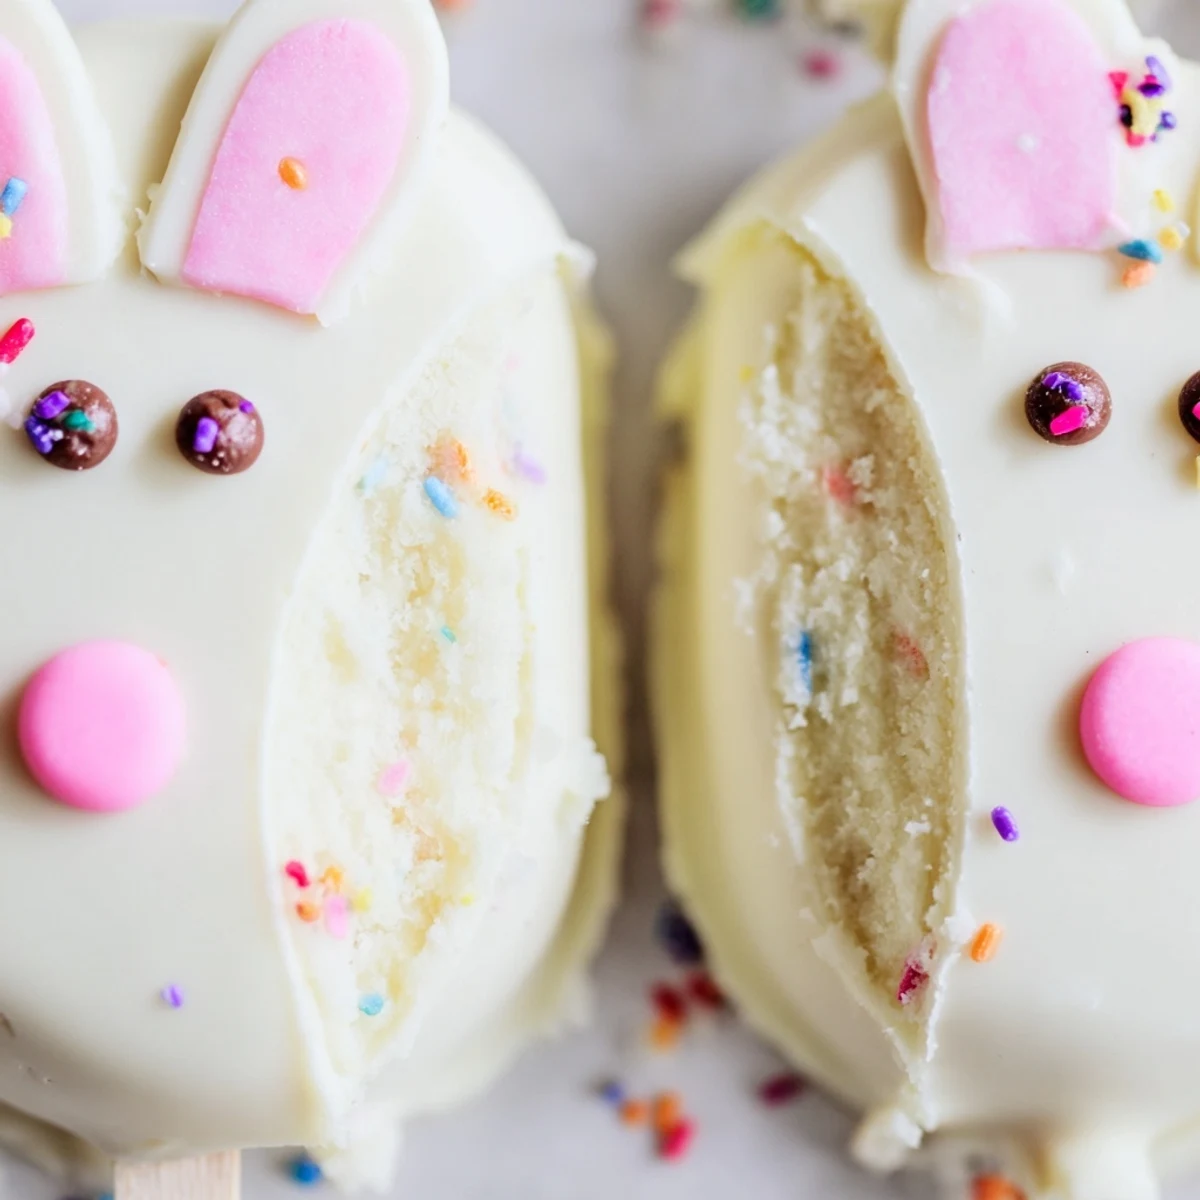
- Vanilla cake crumbs: These create the tender base of your cakesicles. Use crumbled cake from a recent bake or high-quality store-bought cupcakes.
- Cream cheese: The secret binder that holds everything together while adding tangy richness to the sweet mixture.
- Unsalted butter: Works with the cream cheese to create that perfect dough-like texture that shapes beautifully.
- Powdered sugar: Sweetens the cake mixture just enough without making it overly sugary.
- Vanilla extract: Adds warmth and depth that rounds out all the flavors.
- White chocolate: Creates that gorgeous snowy coating and balances the sweet cake inside perfectly.
- Cakesicle sticks: These transform your treats into festive handheld delights.
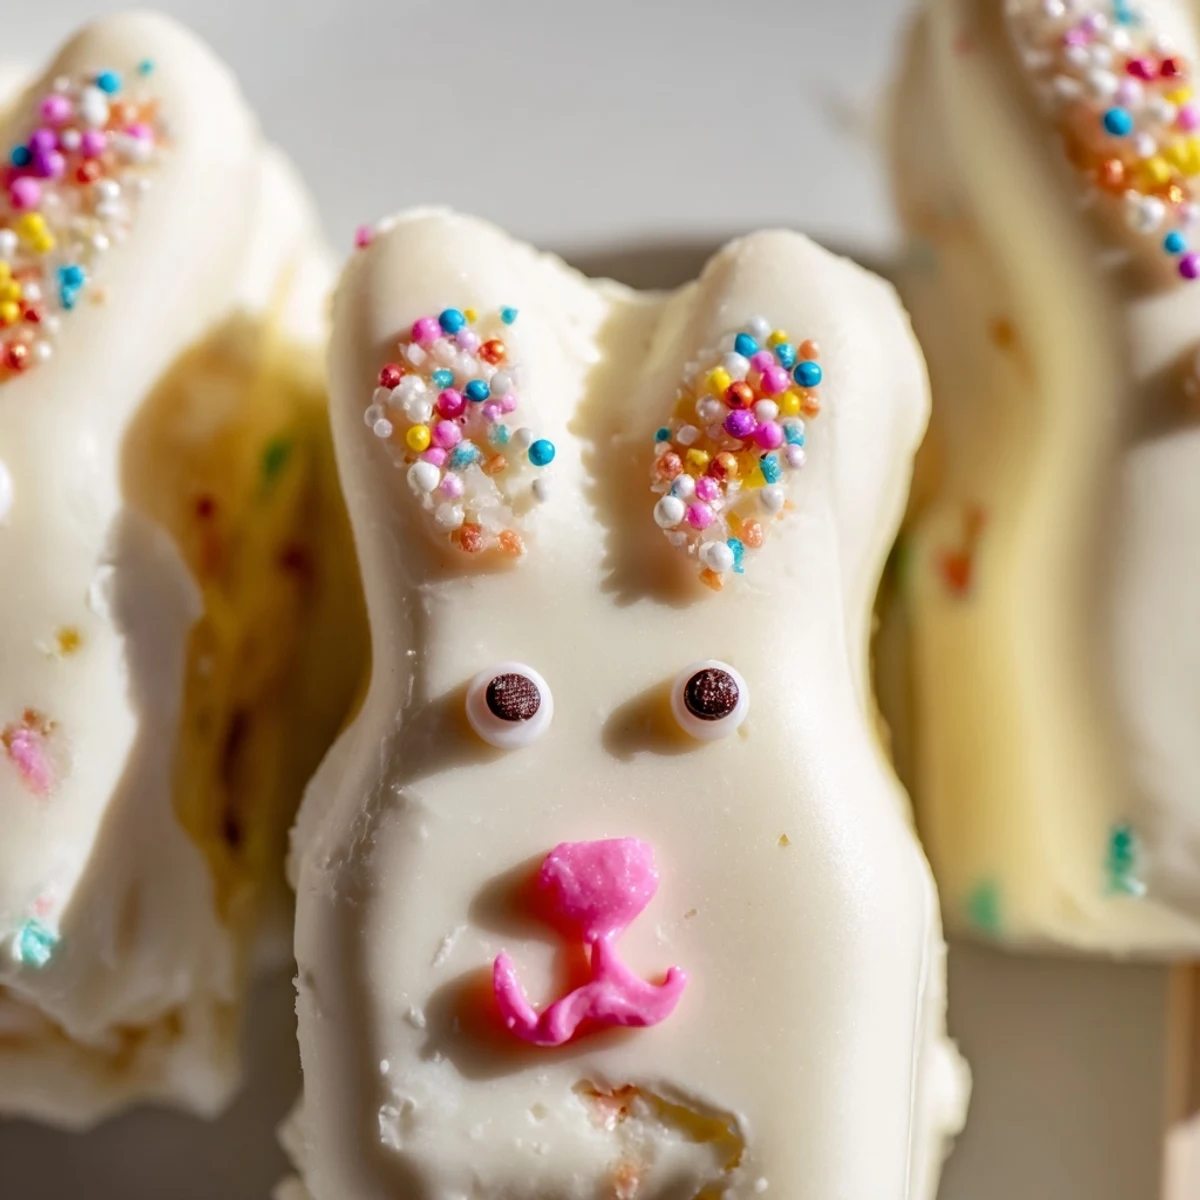
- Decorations: Candy eyes, sprinkles, and fondant ears bring your bunnies to life and add extra fun.
Instructions
- Mix the cake base:
- Combine cake crumbs, cream cheese, butter, powdered sugar, and vanilla in a medium bowl. Mix until everything comes together into a soft, pliable dough that holds its shape when squeezed.
- Shape your bunnies:
- Divide the mixture into 8 equal portions and gently flatten each into an oval bunny face shape, about two inches long and one inch wide.
- Add the sticks:
- Press a cakesicle stick about halfway into each bunny shape, then place them on a parchment-lined tray. Refrigerate for 20-30 minutes until firm to the touch.
- Melt the chocolate:
- Heat white chocolate in a microwave-safe bowl in 30-second intervals, stirring between each burst until completely smooth and pourable.
- Coat the bunnies:
- Dip each chilled cake pop into the melted chocolate, swirling gently to coat completely. Tap against the bowl edge to remove excess and place back on parchment.
- Decorate while wet:
- Immediately add candy eyes, sprinkle noses, or press fondant ears into the soft chocolate before it sets.
- Set and serve:
- Let the cakesicles harden at room temperature for about 20 minutes, or speed things up with 10 minutes in the refrigerator.
 Save
Save My neighbor started calling me the bunny lady after I brought a batch over last spring. Now I keep a stash of these in the freezer year-round, pulling them out for birthday parties and school events whenever we need something that makes people smile.
Getting The Shape Right
The bunny face shape is surprisingly forgiving. Start with a ball, flatten it into an oval, then use your thumb to gently indent where the ears will go. The imperfections make them look more charming and handcrafted, like each bunny has its own personality.
Decorating Made Simple
Candy eyes transform plain shapes into personalities instantly. I keep a variety of sprinkles and colored sugars on hand because the white chocolate acts as glue for almost anything. Pink sugar for noses, rainbow sprinkles for ears—let creativity guide your hands.
Storage And Make Ahead Tips
These freeze beautifully for up to a month, layered between parchment paper in an airtight container. Thaw them in the refrigerator for an hour before serving and they will taste freshly made.
- Wrap each cakesicle individually in plastic wrap for easiest grab-and-go serving
- Leftover white chocolate can be drizzled over the tops for extra decoration flair
- Set up a decorating station and let guests create their own bunny faces
 Save
Save These bunny cakesicles have become my go-to for bringing joy to any spring gathering, and I hope they hop right into your holiday tradition too.
Common Questions
- → What makes these bunny cakesicles special?
-
The combination of moist vanilla cake centers with smooth white chocolate coating creates a delightful texture contrast. The bunny shape and customizable decorations make them perfect for Easter celebrations and children's parties.
- → How long do these treats stay fresh?
-
Store your cakesicles in an airtight container in the refrigerator for up to 3 days. The cool temperature helps maintain the white chocolate coating's shine and keeps the cake centers fresh.
- → Can I use different cake flavors?
-
Absolutely! While vanilla cake crumbs create a classic base, you can substitute chocolate, lemon, red velvet, or any cake flavor you prefer. Different flavors pair wonderfully with white chocolate coating.
- → What's the best way to melt white chocolate?
-
Melt white chocolate in a microwave-safe bowl using 30-second intervals, stirring between each burst. This gradual approach prevents scorching and ensures smooth, silky consistency for even coating.
- → Do I need special equipment?
-
Basic kitchen tools work fine! While cakesicle molds help achieve uniform shapes, you can hand-form the bunny faces. Essential items include cakesicle sticks, parchment paper, and a microwave-safe bowl for melting chocolate.
- → Can I make these ahead of time?
-
Yes! Prepare the cake mixture and shape the bunnies up to 24 hours ahead. Keep them refrigerated until ready to coat with chocolate. Decorate just before serving for the freshest appearance.